This is the first screen you are presented with when the ZKeypad application starts. This screen acts as a gateway to all the other screens in the Application.
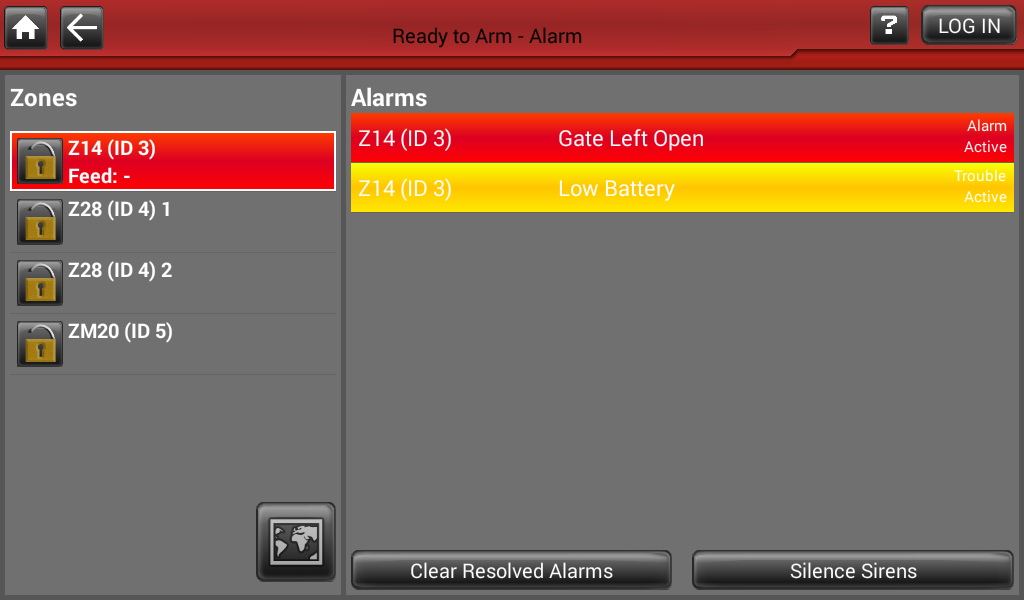
This screen can be accessed by touching the header bar (where it currently states "Ready to Arm - Alarm" in the image below) when the keypad is in alarm. Pressing the "Silence Sirens" button will turn off the sirens and strobe, but will not dismiss any active alarms. Devices will stay armed and the siren will re-sound if any new alarms come in. Any resolved alarms that don't automatically clear from the alarms screen can be manually cleared with the "Clear Resolved Alarms" button.
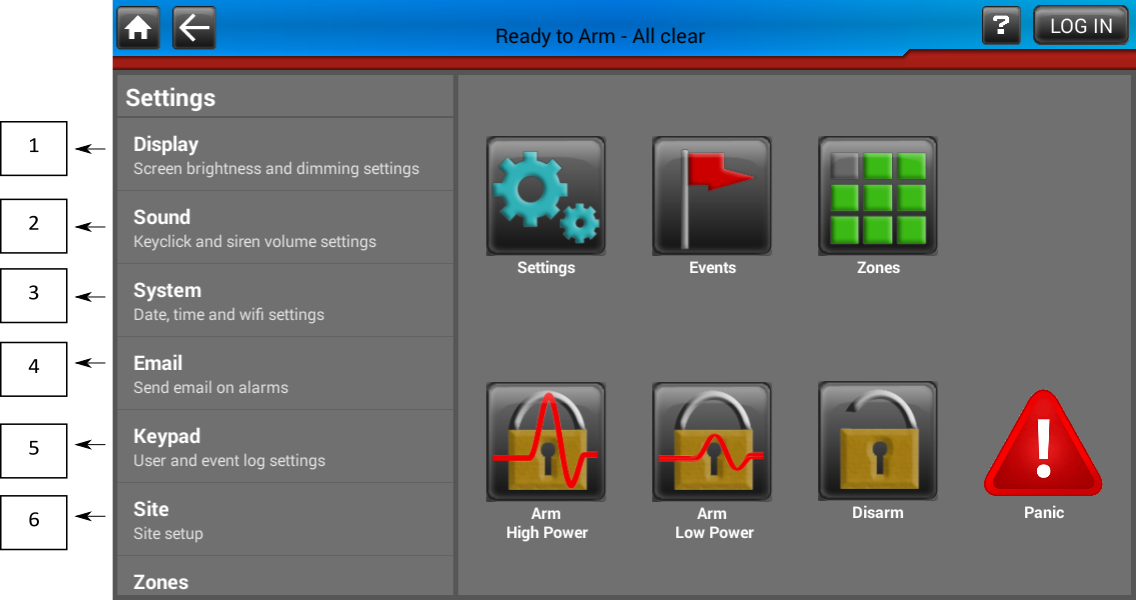
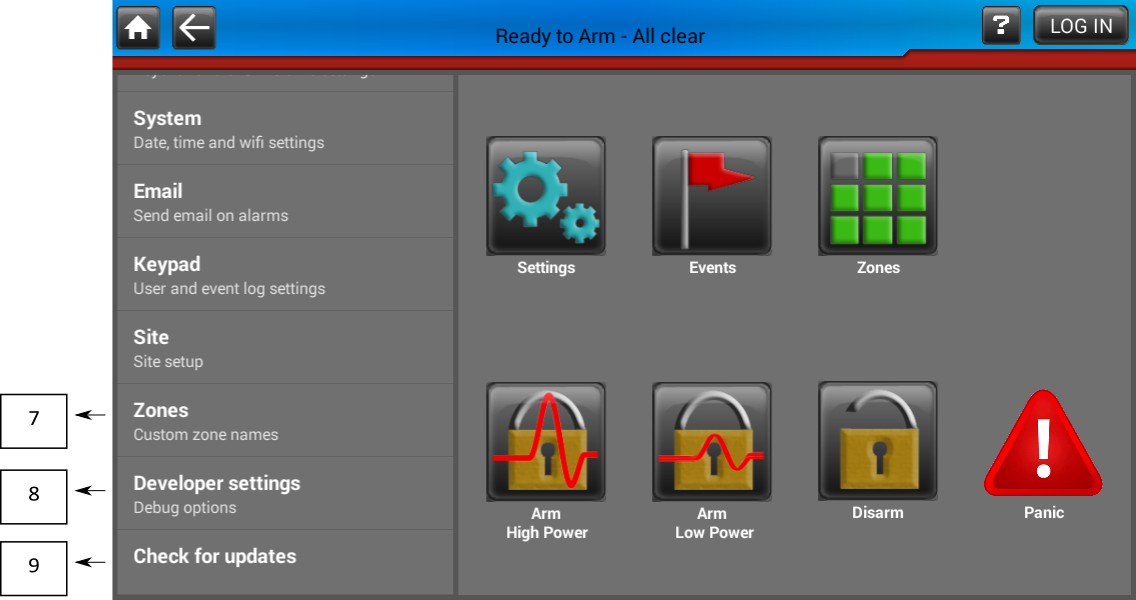
This screen allows the user to adjust preferences such as the screen brightness, zone names and other application preferences.
| Option | Description |
|---|---|
| Manual Brightness | If checked will enable the Brightness slider allowing you to select the application brightness manually. If unchecked the brightness will be set automatically |
| Screen Dims | This option sets the idle time required before the screen dims |
| Option | Description |
|---|---|
| Keyclick volume | Slider that adjusts the click volume that plays when a button is pressed |
| Siren volume | Slider that adjusts the siren volume that plays when an alarm is detected |
| Siren mutes | Option that allows you to adjust how long the siren will play for before being disabled |
| Option | Description |
|---|---|
| Set date and time | this option sets the systems date and time |
| Wi-Fi Settings | this option launches the Wi-Fi settings such that the tablet can connect to a local Wi-Fi network |
| Option | Description |
|---|---|
| These settings allow the tablet to be configured to email up to two email addresses when a fence alarm occurs. This can be configured such that only certain alarms will cause an email to be sent |
| Option | Description |
|---|---|
| Automatically logout | This option will automatically log the user out after the selected amount of inactivity |
| User pin | This setting allows you to change the pin required for logging on as a user |
| Delete events | This option adjusts how many days worth of events are stored and displayed in the events screen. If a Micro SD card has been inserted the device will backup all events to this but will only display the amount of days worth of events selected here |
| Show all events | This option toggles between whether the event log shows all system events or if it only shows important events |
| Delete events | This button allows you to delete all the events |
| Quiet hours | This interface allows you to silence all but the most critical alarms between specifiable times |
| Option | Description |
|---|---|
| Installers details | by editing this text field you can adjust what is displayed on the home screen under the JVA logo |
| Site Name | this settings allows the site name to be set. This name is used when emails are sent and for the file name when the site is saved |
| Clear site | this clears all the devices that are currently in the site |
| Save site | this allows the current sites configuration to be saved to the SD card |
| Load site | this setting allows a sites settings to be loaded into the keypad without having to configure the site manually |
| Mimic map | this setting enables or disables map of your property |
| Edit map | this setting launches the edit map view. From here you can load a map from google maps or from the sdcard. After that you can draw your zones onto the map |
| Auto-build zones | by checking this any devices that are added to the site are automatically picked up by this keypad |
| Panic Button | allow the use of the panic button |
| Keypad id | this is where the keypad id is set |
| Baud rate | this is where the baud rate is set |
| Installer pin | this setting allows you to change the pin required for logging in as an installer |
| Option | Description |
|---|---|
| Set date and time | this option sets the systems date and time |
| Wi-Fi Settings | this option launches the Wi-Fi settings such that the tablet can connect to a local Wi-Fi network |
| Option | Description |
|---|---|
| Zones | This shows all the zones in the site that have been detected by the keypad. By pressing on each zone they can be renamed to something more intuitive |
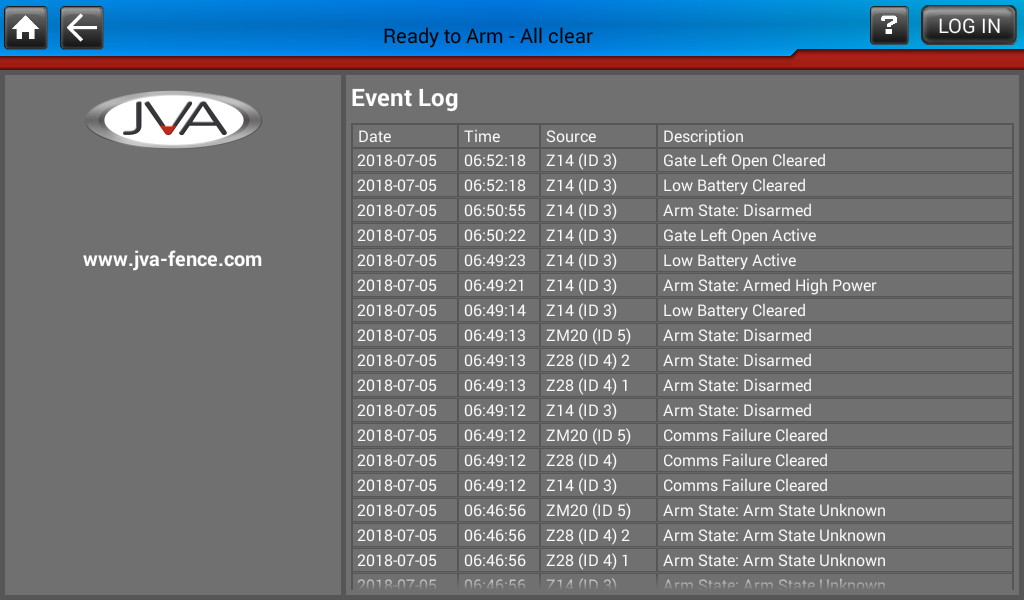
This screen allows you to view all the events that have been logged by the keypad over the set amount of days set in the keypad settings.
This screen allows you to create your very own map of your property with fence lines drawn onto it. This allows you to visualise what section of fence is in alarm from the "Zones" screen. First you need to import a map either from Google Maps or from the SD Card. To do this click on the gallery button and choose either "Load from Google Maps" or "Load from file". To "Load from File" you must first place a FAT32 formatted SD Card into the tablet with the application running. This will create the necessary folder structure onto the SD Card. After 10 seconds or so, remove the SD Card and plug it into your PC. You should see a folder called maps. Place any .jpg, .jpeg or .png file in there and then once again place the SD Card back into the Touch Keypad. Now when you click "Load from File" you should see the map you just copied onto the SD Card. Once you have loaded a map you can begin drawing your fence lines. Select the zone you wish to draw from the zone list on the left and then simply start drawing your zone lines. If you make a mistake you can click the undo button at any time. you can tweak a line by placing your finger near any of the vertices and dragging. Once you are happy with your fence lines simply press the home button - it will save automatically.
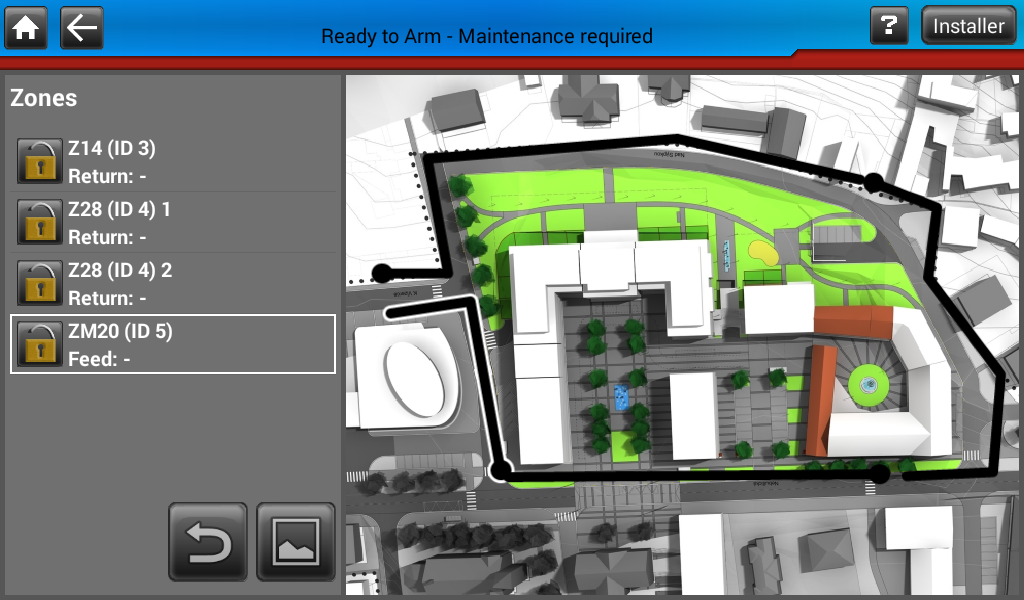
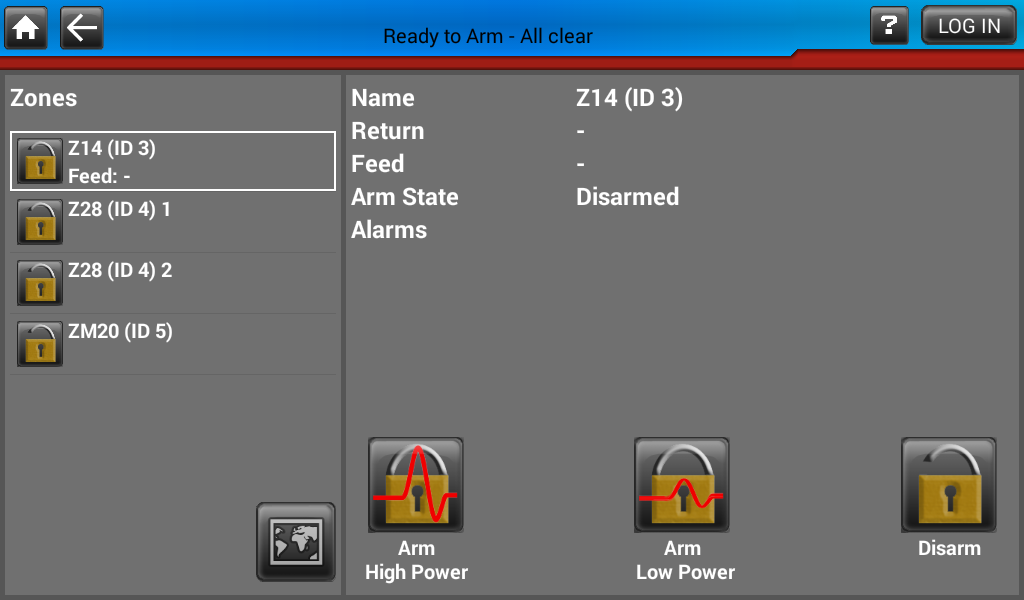
The zones screen (left) displays the zones that are currently in the site and by selecting one you can find further information about the zone in the zone details screen (right). In the zone details screen you can set the currently selected zone to high or low power as well as the ability to disarm it. If you have enabled the "Mimic map" button in site settings you will have a map button. press this to view your map
The map screen shows at a glance the state of your zones. In this example all of our zones need maintenance and are yellow. To the right your can see some floating buttons that allow you to arm and disarm your entire site. You can click the "Zone details" button to view in depth information about each zone
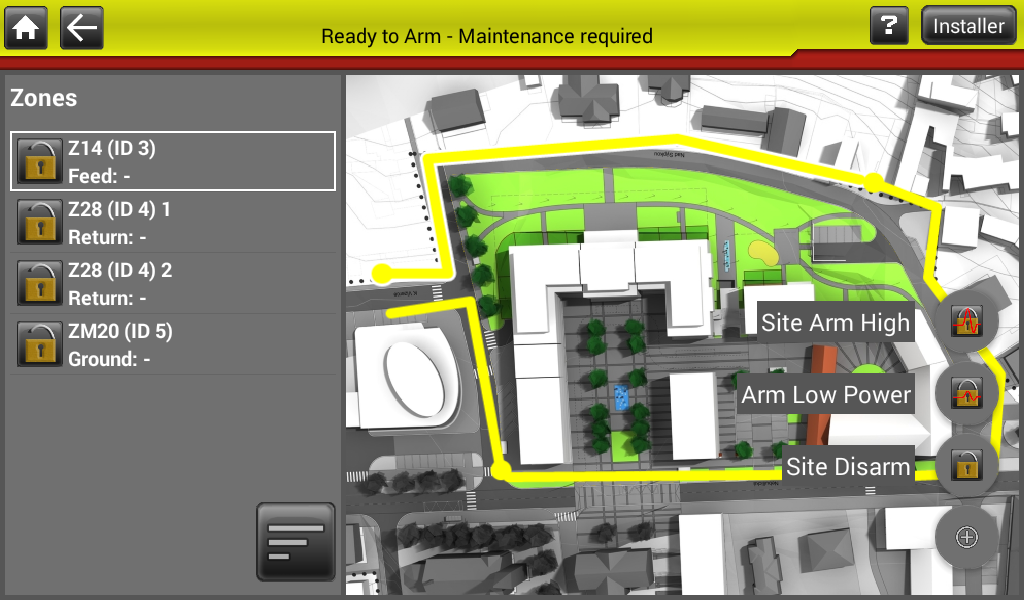
| Option | Description |
|---|---|
| red | zone is in Alarm |
| yellow | zone is in maintenance or trouble alarm or its arm state is unknown |
| blue | zone is armed and there are no alarms |
| green | zone is disarmed and there are no alarms |
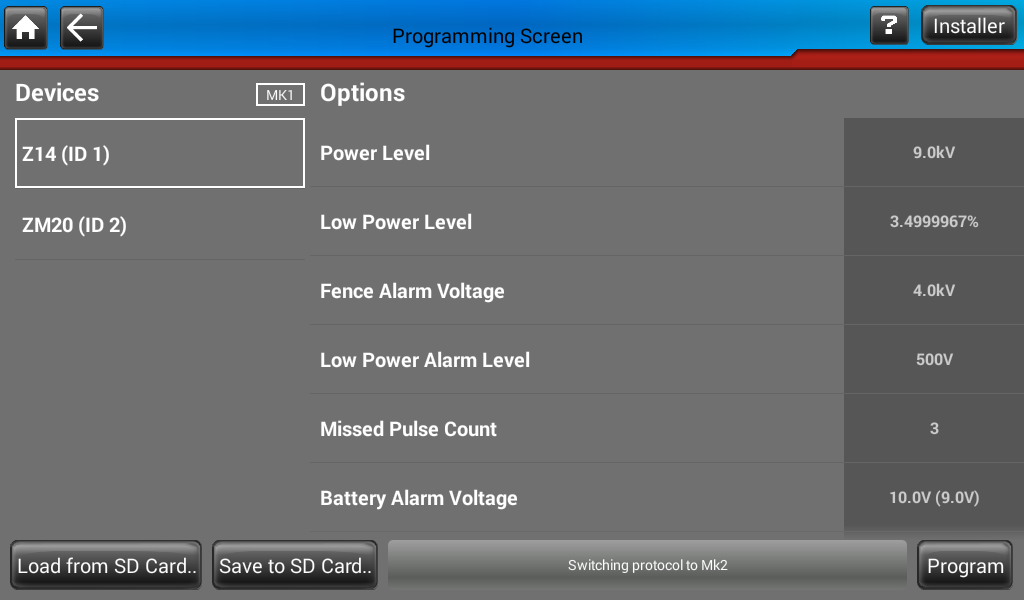
This screen is opened via the Program Devices button in the Site settings. This Screen allows an installer ot configure each energiser quickly without having to slowly enter key combinations. To start programming, choose a device from the list to the left. The keypad will put the device into programming mode and attempt to read back the existing settings (only possible if the bus supports Protocol Mk2). Simply make the changes to the appropriate settings and then press "Program". This screen also has the ability to save and load settings, so if there are device settings that you frequently program these can be loaded in and then programmed straight away to the device you wish. When you are done programming the device simply press the "Exit Program mode" button.